Time to add a little color into your space! I can’t wait to share these 7 simple steps to creating fabric color blocks for your walls.
1. Sketch out the Room
The first step is to sketch out your room. Next, decide what wall will be the focal point of the room and draw out a rough placement for your four color blocks. Finally, determine the size for each block and write it down on your sketch.

2. Choosing a Color Palette
Start by determining the colors for your walls and then choose your accents. The main wall where the color blocks are positioned will be the focal point of the room and should feature the strongest color. Next, chose the colors for your blocks.

Pro Tip – Use paint swatches from a local hardware store to create your color palette.
3. Purchasing Fabric and Wood Supplies
Select your fabrics and wood for the frames and wood screws. Don’t forget to bring your sketch with you as you’ll need to know how much wood and fabric to buy.

Pro Tip – For extra support, buy corner braces.
4. Cut Wood to Size
Measure twice, cut once! A circular saw will make the cleanest and quickest cuts, but a hand saw will work as well. Once you have made your cuts for each block, place the four pieces for each block in separate piles to stay organized.

Pro Tip – Number the pieces. Start with 1A and then go clockwise around the block…1B, 1C & 1D.
5. Assemble the Wooden Frames
Start with the biggest block and work your way through the other blocks in descending order. Begin with the A and B pieces. Place the edges together to form a 90-degree angle. Secure two screws into the frame by drilling through the A piece into the B piece.

Pro Tip – Drill pilot holes before inserting screws to ensure the wood won’t split.
6. Attach Fabric
Starting with the A piece, attach the fabric to the frames with a stapler, Start in the corner and stagger your staples an inch apart. Next, secure fabric to the C piece. Then take the fabric from the corner of the B piece and fold over the corner of the C piece and secure with a staple. Repeat steps until finished.

Pro Tip – Steam the fabric once it is on the frame to eliminate any pesky wrinkles.
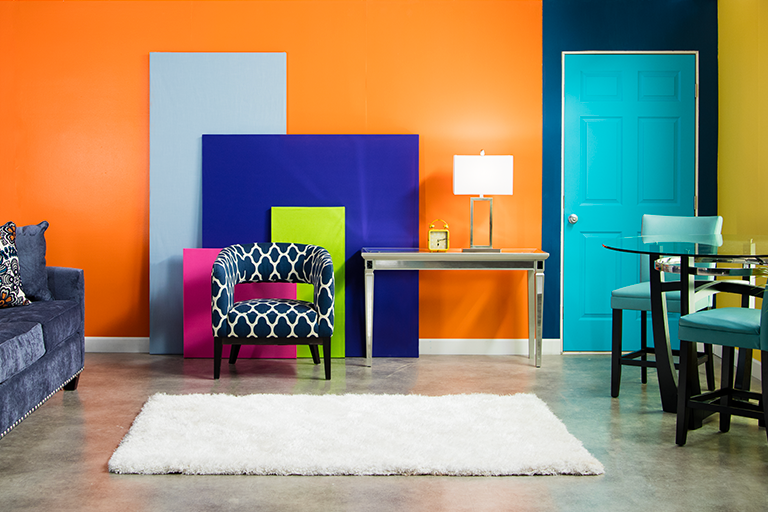
7. Arrange the Room
Time to arrange the blocks in your living room. Remember to stagger the placement of your blocks to add contrast and to fully showcase all of your colors.

Do you love this look? I’d love to see your color blocking! Snap a pic and tag us on social – @mybobs.com for a chance to be featured in my feed.