Deck the halls, the walls, the fireplace, and the tree for the holidays! Bring the bins up from the basement, and unpack the ornaments! Most ornaments can fall into one of four categories:
- Traditional – Bulbs! Of all colors, shapes, and sizes.
- Novelty – That leg lamp your co-worker got you for last year’s secret Santa.
- Sentimental – ”Baby’s First Christmas,” enough said.
- DIY – The paper snowflake you made in your 3rd grade art class.
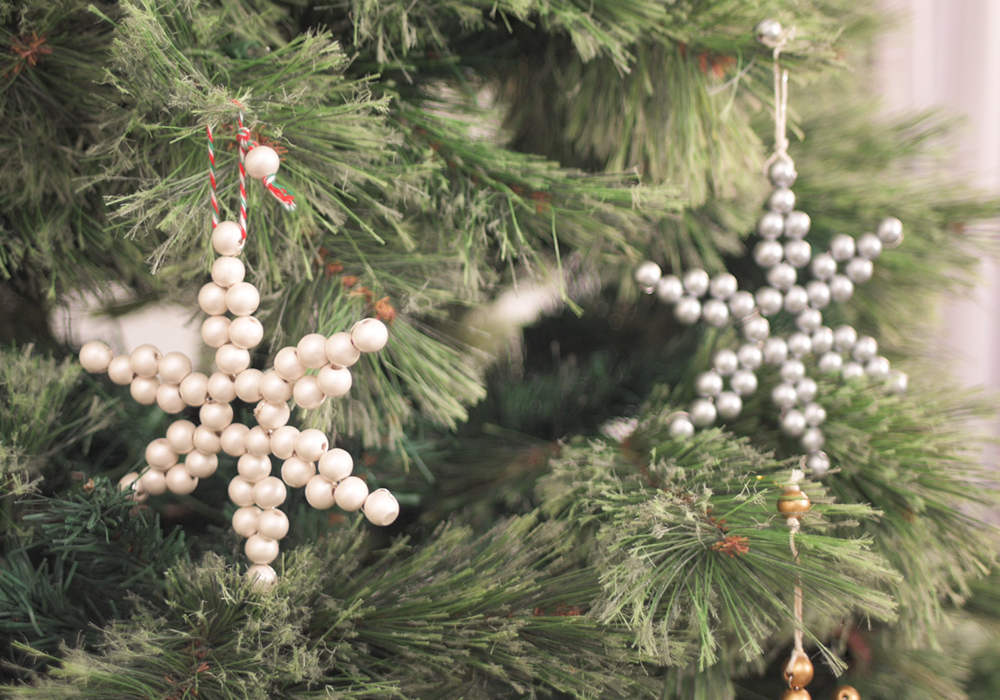
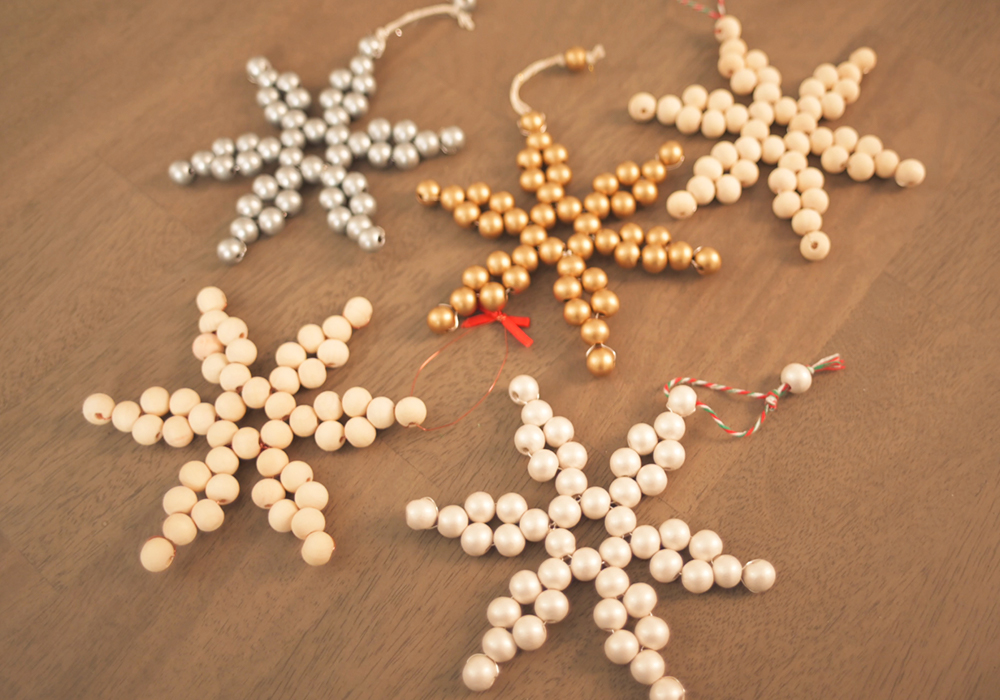
As much as that snowflake means to you, every year you question whether or not it’s time to retire it from the tree. Fortunately for you, I found an alternative solution…upgrade! Wow your family this holiday with a DIY snowflake that is so easy, a spokespuppet could do it.
What you’ll need:
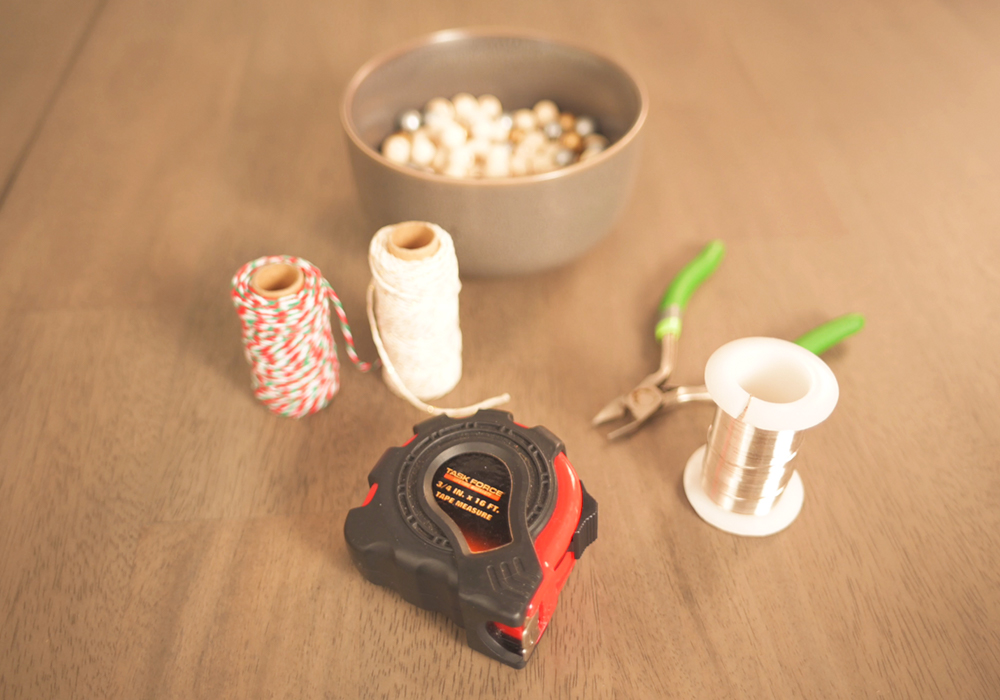
- 12mm wooden beads
- 24 gauge jewelry wire
- Measuring tape
- Wire cutters
- Festive twine or string
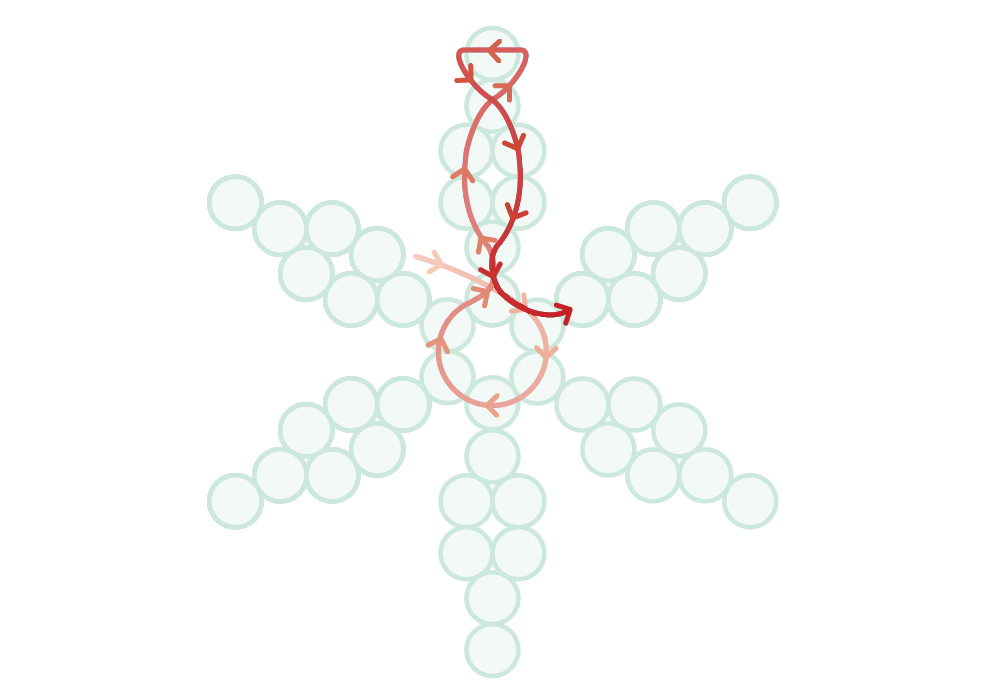
Use this template to help you navigate your wire path and follow the pattern in the next few steps!
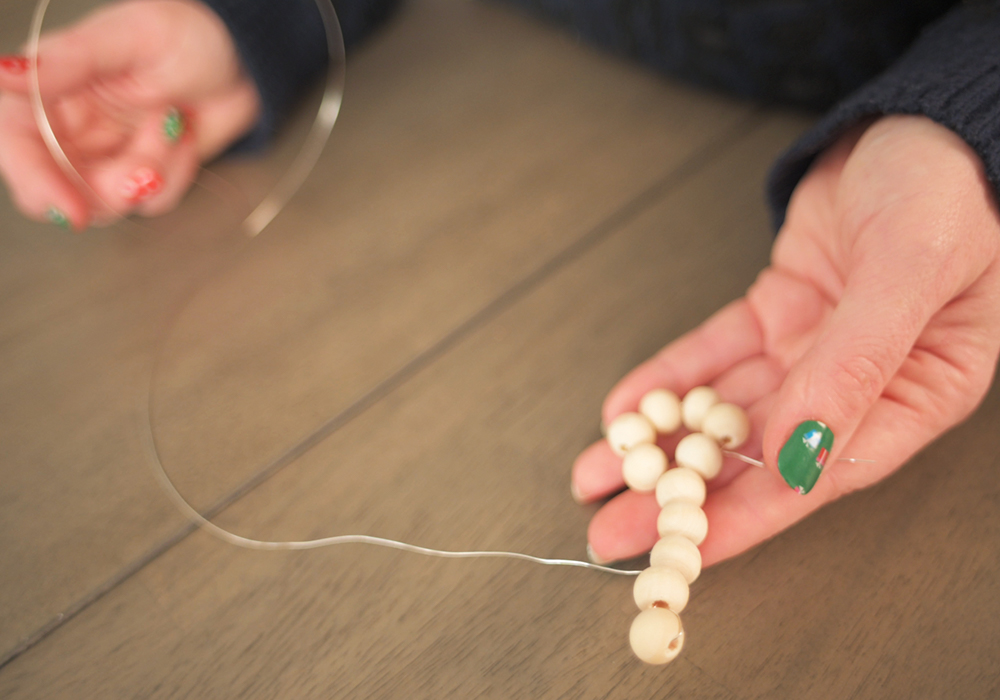
Step 1: You snow the drill!
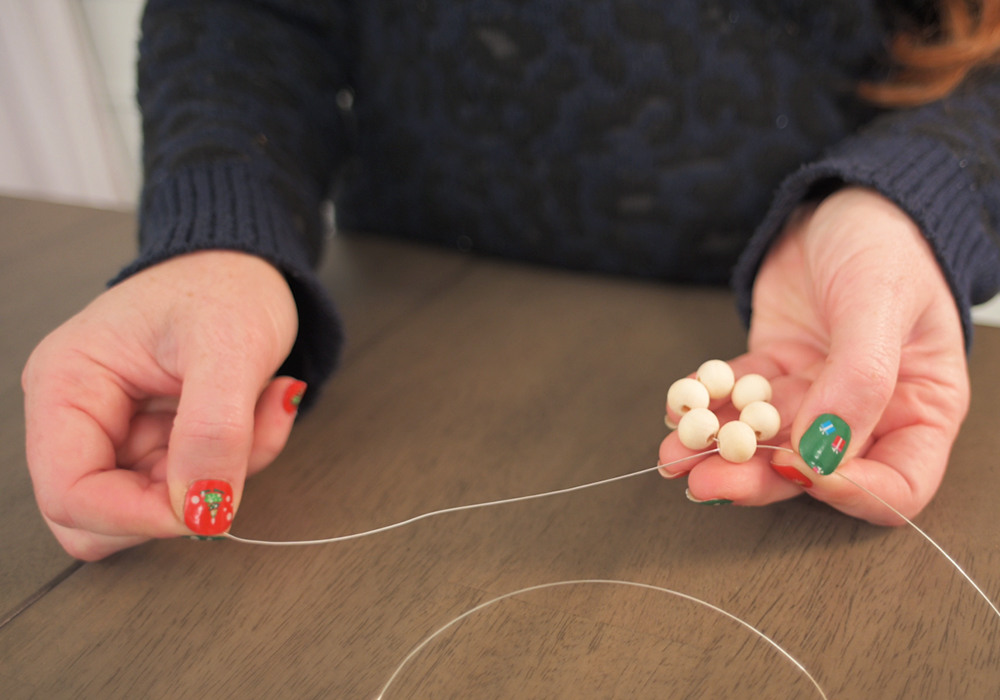
Use your wire cutters to cut a piece approximately 40” in length. The first part of the snowflake you’ll need to thread is the middle circle, made up of six beads (the total project should use about 48). Leaving a couple inches at the end, thread on six beads. Pull into a circle and pull the wire through the first bead a second time, enclosing the center.
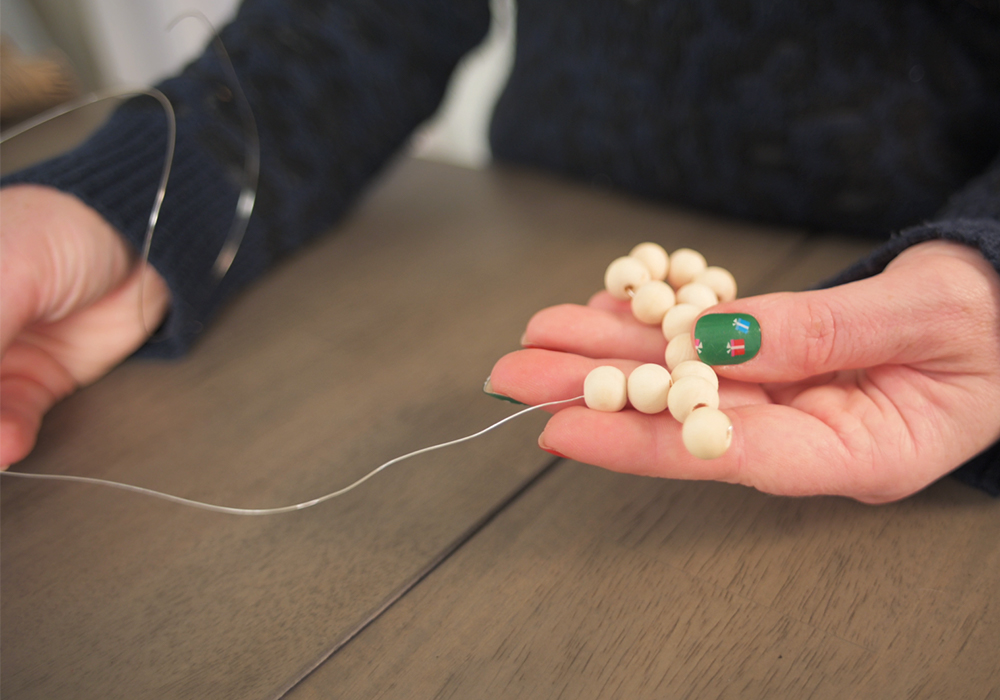
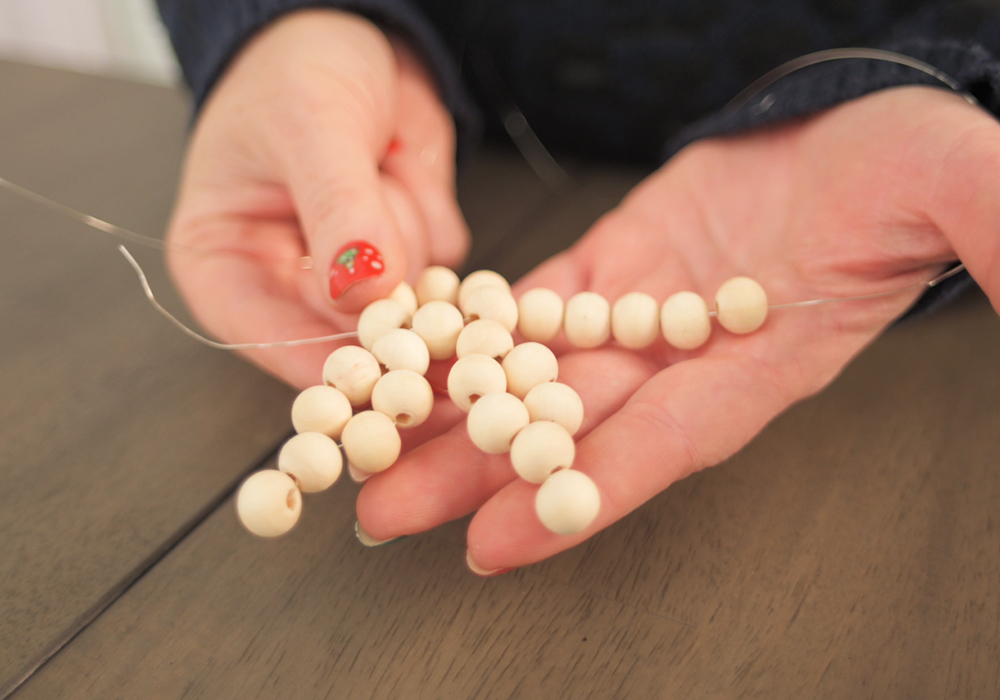
Step 2: Icy what you did there…
Now here’s where it gets tricky. Thread five beads on to the wire. The fifth bead will be the tip of your snowflake, so now we have to work our way back to the center. Loop the wire back through the previous, but only one. Next, add two additional beads and thread your wire back through the one closest to the center and the nearest right bead in the circle, also only one. Repeat this step five times to form six total arms around the perimeter of the snowflake. After the last arm, wrap any remaining wire around the inner circle to secure in place.
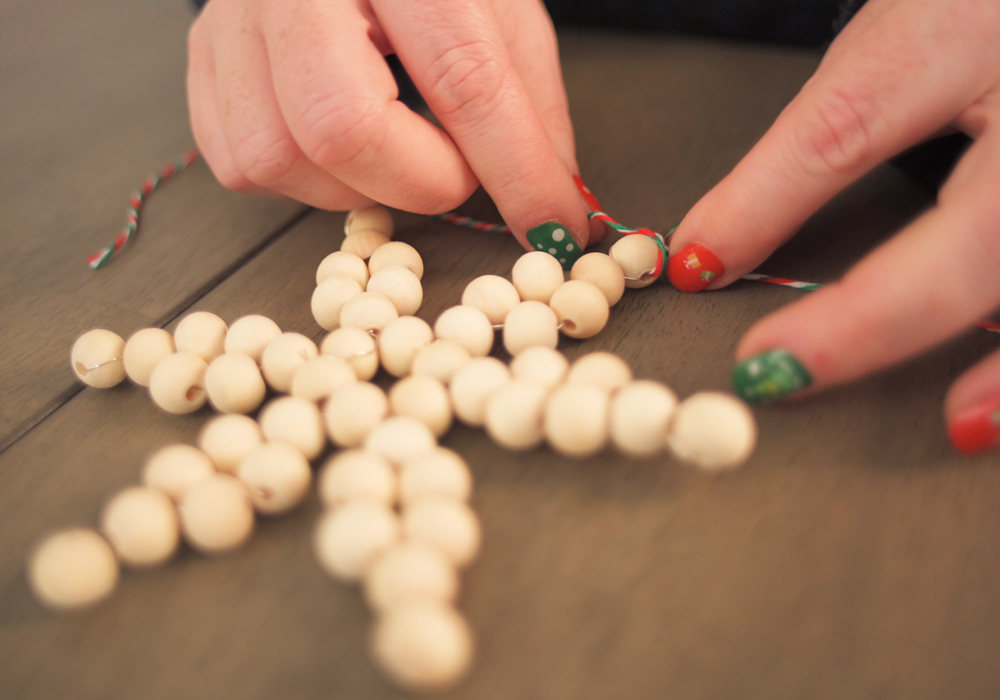
Step 3: Time to “spruce” things up!
Whichever arm of your snowflake is the top one, loop your twine through and tie a small knot around the bead, and then the two ends together for easy hanging!
Step 4: Let’s take an elfie around the tree!
If you don’t take a picture of your hard work to post on Instagram, did it even happen? Turn on the holiday tunes, grab your hot chocolate, and get to decorating so you can enjoy your snowflakes all season long.

Show us your snowflakes (or share your favorite holiday puns) by tagging @mybobs on our social channels!