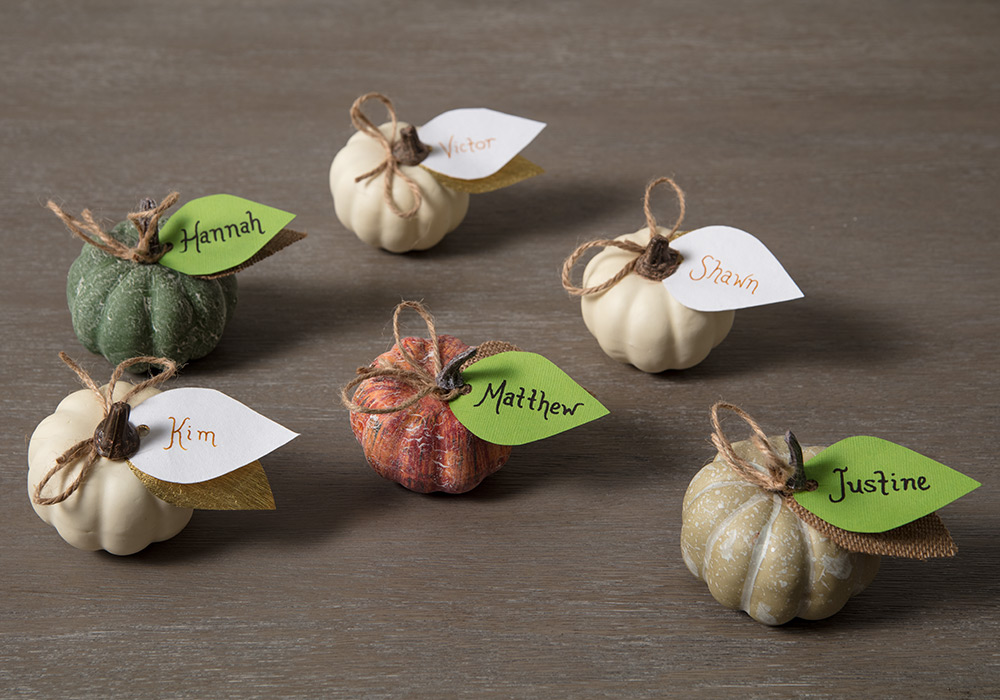

Give your dining room table a festive feel and your guests a fun little surprise with these charming pumpkin name card holders. This project is super fun and easy to complete. So don’t worry if you’re not an expert crafter. I’ll walk you through all the steps.
Step 1: Gather Your Supplies

Good news. You don’t need to spend a lot of money on supplies for this project. A quick trip to your local craft store and about $20 is all you’ll need. Here’s my list of supplies, but feel free to improvise and add your own creative touch!
What You’ll Need
- Scissors
- Pencil
- Hole punch
- Twine
- Miniature pumpkins
- 1 piece of cardstock colored paper
- 1 piece of cardstock white paper
- 1 piece of gold paper
- 1 hour to complete
Step 2: Trace the Leafs on the Colored Paper

Draw a leaf on a white piece of paper and then cut it out. You’ll use this leaf as your template. Make sure the leaf is big enough to write on, but not too big that it overshadows the pumpkin.
After you cut out the template, place it on your colored paper and trace as many leaves as you need. Add a few extra leaves just in case! Repeat this process depending on how many different types of colored paper you’re using.
Step 3: Cut out the Leaves

Next, cut out all the leaves. I recommend taking your first cut out and placing it on the pumpkin to make sure you like the size before cutting out all the leaves and realizing that the leaves aren’t the right size.
Step 4: Punch Away

Use your hole punch to create a single hole near the rounded part of the leaf. Be careful not to punch this right near the edge. I like to leave at least the space of one hole from the edge before I punch in.
Step 5: Name that Card!

Now it’s time to write the names of everyone that will be attending your dinner party. I like to have an extra piece or two of paper off to the side to practice writing names. I also like to keep a few extra leaves and pumpkins around in case unexpected guests show up.
Step 6: Attach the Twine and Leaves

This is when it all starts to come together! Start by threading the twine through the leaves. Then tie it to the pumpkin stem and finish it off with a nice bow.


Step 7: Place on Your Table & Enjoy!

You did it! Not only was that super easy and fun, but you also have this very cute pumpkin name card holder!
Share Your Project!
I’d love to see your pumpkin name card holder. Snap a pic, share it on social, and make sure to tag me @mybobs for a chance to be featured in my feed.